
")


Chauffeur Booking System v6.1 for WordPress
Original price was: ₹999.00.₹19.00Current price is: ₹19.00.
- Original product with the lowest price ever
- Downloaded from original authors
- Instant delivery with fast downloading speed
- 100% clean and tested code
- Product Version: Chauffeur Booking System 6.1 (Latest version)
- License: GPL
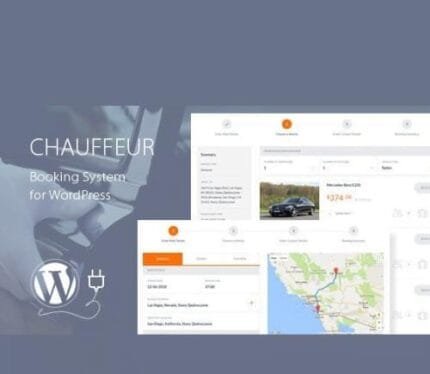
Chauffeur Booking System for WordPress
Chauffeur Booking System is a powerful limo reservation WordPress plugin for companies of all sizes. It can be used by both limo and shuttle operators. It provides a simple, step-by-step booking process with online payments, e-mail and SMS notifications, WooCommerce and Google Calendar integration, and an intuitive backend administration.
With Chauffeur Booking System, you can easily take online reservations for any route defined, e.g., airport transfer or city tour, hourly or point-to-point, with support for intermediate points (stops). It will help you enhance customer service and manage your limo rental business online.
Chauffeur Booking Core Features
RESPONSIVE LAYOUT
Chauffeur Booking is fully responsive, meaning each plugin element adapts perfectly for any screen size.
3 TYPES OF SERVICES / STEP-BASED NAVIGATION
The plugin offers support for 3 types of services: Distance (Point-to-Point), Hourly, Flat Rate, and the possibility of using all or only selected ones. The navigation in the plugin is based on convenient steps.
LIVE ROUTE PREVIEW / TOTAL DISTANCE, TOTAL TIME CALCULATION
The plugin draws a route map and supports an unlimited number of intermediate points (stops). It also calculates the total distance and total time (including extra time and return time if applicable).
MULTIPLE BOOKING FORMS
You can create an unlimited number of booking forms and use different settings for each of them.
EXTRA TIME, RENTAL TIME / ADVANCED BOOKING PERIOD
Choose whether you want to offer the option of extra time, specify the minimum and maximum rental time of the vehicle, and set the booking period to allow booking up to a defined number of days in advance.
BUSINESS HOURS
Specify working days/hours (in HH: MM time format) for each day of the week.
EXCLUDED DATES / E-MAIL NOTIFICATIONS
Specify and manage the dates not available for booking. Define the list of recipients and select the sender’s e-mail account from which the messages will be sent with info about new bookings.
MULTIPLE PAYMENT METHODS
Chauffeur Booking plugin provides multiple payment methods, including PayPal, Stripe, Cash, and Wire Transfer. If you use WooCommerce on your website, you can use the payment methods supported by WooCommerce.
CUSTOM COLORS
Define your own colors to match the booking form to your site.
BOOKING EXTRAS
Add an unlimited number of add-ons that the customer can select, like a child seat, alcohol package, or a box of chocolates.
DEFINE YOUR OWN ROUTES
You can define your own routes. This is useful for a specific business type like shuttle operators, airport transfers, or city tours.
VEHICLES
Define an unlimited number of vehicles (limos) and set several parameters for them. Set vehicle name and description, featured image and vehicle type, make, and model. Enter a maximum number of passengers and suitcases. Enter price per distance and hour, specify tax rate, and assign vehicle attributes.
ATTRIBUTE TYPES
You can define an unlimited number of vehicle attributes like color, engine, etc., and then you can assign them to individual vehicles (limos) in their settings.
VEHICLE ATTRIBUTES
Give values to vehicle attributes while editing a vehicle.
TAX RATES / CURRENCY
Define available tax rates like 0%, 8%, 23%, and choose one of the 160 available currencies.
SMART STICKY SIDEBAR
The summary of your order is always visible even when scrolling the page.
VISUAL COMPOSER INTEGRATION / GOOGLE CALENDAR INTEGRATION
Chauffeur Booking comes integrated with popular Visual Composer for WordPress plugin and Google Calendar for bookings.
EXTENSIVE PRICING RULES
You can define your own pricing rules depending on the booking form, selected vehicle, service type, route, day of the week, range of dates or hours, and even ride distance. For example, you can set a different ride price each weekend over a distance greater than 50 km. You can define an unlimited number of pricing rules.
DRIVING ZONE / CUSTOM ORDER FORM FIELDS
Set your driving zone – an area of your business. You can choose from the list of countries or draw an area on the Google Map. For example: if you choose Russia or an area with a radius of 50 km from Paris, your clients will not be able to order a chauffeur outside of this criterion.
The convenient form builder will allow you to create an order form tailored to your business. Create sections and form fields, specify whether a field is required, and settle your own error messages.
SMS INTEGRATION WITH NEXMO AND TWILIO
Chauffeur Booking comes integrated with Nexmo and Twilio API for SMS notifications to improve the customer experience. By adding e-mail notifications, your clients will always be well informed.
RTL SUPPORTED / WOOCOMMERCE INTEGRATION
Set a right-to-left writing system if it’s your default script.
If you use WooCommerce on your Website, we’ve got you covered. Logging in, registration, order processing, and payment gateways, all this is supported by WooCommerce. Please note, the Chauffeur plugin is also fully functional without WooCommerce installed.
COMPATIBLE WITH WPML
Chauffeur Booking is compatible with WPML, supporting multi-language websites. The .po and .mo files allow you to translate your installation.
ONE-CLICK DEMO INSTALL
Import demo data to start with by using the plugin settings menu.
Chauffeur Booking System Changelog v6.1
Improved code,
Added option to restrict driving zone in case of waypoints.
Chauffeur Booking System Changelog v5.9
Improved code,
Added all booking details to the event in Google Calendar,
Added new price calculation methods of booking,
Added option to use fixed price if passenger mode is enabled,
Added new options for time picker,
Added option to create a drop-down list in step #3 of booking form,
Added option to set a label for transfer type,
Added option to test sending e-mail messages,
Added option to create pricing rules based on postcodes,
How to Install/Update WordPress Themes/Plugins manually?
Step 1: Buy the Product and download the zip file.
Note: Some Zip files need to be extracted before uploading.
If you are performing an update, install the latest theme/plugin, and WordPress will automatically replace the older version with a newer version. All your settings and customizations will be the same as before, and nothing will be changed.
Step 2: Go to “Appearance > Themes” If it’s a theme or go to the “Plugins” section if it’s a plugin through your WordPress dashboard.

Step 3: Click on “Add New” button (It’s same on themes and plugins section)

Step 4: Click on “Upload Theme” or you’ll show “Upload plugin” on plugin section

Step 5: Click on “Choose file” and select the ZIP file of that theme/plugin

Step 6: Hit “Install now”

Step 7: It’ll take few seconds to Install your wordpress product

Step 8: Once it’s done, click “Activate,” your WordPress product will be installed manually.
How to Install Elementor Template Kits?
Step 1: Download your kit file and do not unzip it.
Step 2: In WordPress, go to Settings > Permalinks and ensure Post Name is selected, then Save
Step 3: Go to Appearance > Themes > Add New and ensure Hello Elementor is installed and activated.
Step 4: The theme activation will prompt you to install and activate the Elementor Page Builder plugin if it is not already installed. Click Install, then Activate.
Step 5: Go to Elementor > Settings, click the Features tab, and ensure Flexbox Container has a green icon (if not, set it to Active).
Step 6: Go to Plugins > Add New and search for “Envato” and Install and Activate the Envato Elements – Photos & Elementor Templates plugin
Note: If your Kit requires Elementor Pro, you must install it before continuing.
Step 7: Go to Elements > Installed Kits and click Upload Template Kit ZIP File. Your templates should appear.
Step 8: Check for the orange banner at the top of the screen and click Install Requirements to load the kit addons and settings.
That’s it, and you’re ready to begin building your site!
- Imported templates are stored in Elementor under Templates > Saved Templates and must be inserted to a new page in WordPress before customizing.
- Imported blocks, tabs, or slides are stored in Elementor under Templates > Saved Templates and may be duplicated and customized directly.
- Elementor Pro site parts are stored in Elementor under Templates > Theme Builder and are customized directly.
Check the in-depth details with screenshots about how to install it here: (Copy the below link and open it in a new tab)
https://help.market.envato.com/hc/en-us/articles/36033428836889-How-to-Upload-Install-Elementor-Template-Kits-from-Themeforest-to-WordPress
How to Install/Update WordPress Themes/Plugins manually?
Step 1: Buy the Product and download the zip file.
Note: Some Zip files need to be extracted before uploading.
If you are performing an update, install the latest theme/plugin, and WordPress will automatically replace the older version with a newer version. All your settings and customizations will be the same as before, and nothing will be changed.
Step 2: Go to “Appearance > Themes” If it’s a theme or go to the “Plugins” section if it’s a plugin through your WordPress dashboard.
Step 3: Click on “Add New” button (It’s same on themes and plugins section)
Step 4: Click on “Upload Theme” or you’ll show “Upload plugin” on plugin section
Step 5: Click on “Choose file” and select the ZIP file of that theme/plugin
Step 6: Hit “Install now”
Step 7: It’ll take few seconds to Install your wordpress product
Step 8: Once it’s done, click “Activate,” your WordPress product will be installed manually.
How to Install Elementor Template Kits?
Step 1: Download your kit file and do not unzip it.
Step 2: In WordPress, go to Settings > Permalinks and ensure Post Name is selected, then Save
Step 3: Go to Appearance > Themes > Add New and ensure Hello Elementor is installed and activated.
Step 4: The theme activation will prompt you to install and activate the Elementor Page Builder plugin if it is not already installed. Click Install, then Activate.
Step 5: Go to Elementor > Settings, click the Features tab, and ensure Flexbox Container has a green icon (if not, set it to Active).
Step 6: Go to Plugins > Add New and search for “Envato” and Install and Activate the Envato Elements – Photos & Elementor Templates plugin
Note: If your Kit requires Elementor Pro, you must install it before continuing.
Step 7: Go to Elements > Installed Kits and click Upload Template Kit ZIP File. Your templates should appear.
Step 8: Check for the orange banner at the top of the screen and click Install Requirements to load the kit addons and settings.
That’s it, and you’re ready to begin building your site!
- Imported templates are stored in Elementor under Templates > Saved Templates and must be inserted to a new page in WordPress before customizing.
- Imported blocks, tabs, or slides are stored in Elementor under Templates > Saved Templates and may be duplicated and customized directly.
- Elementor Pro site parts are stored in Elementor under Templates > Theme Builder and are customized directly.
Check the in-depth details with screenshots about how to install it here: (Copy the below link and open it in a new tab)
https://help.market.envato.com/hc/en-us/articles/36033428836889-How-to-Upload-Install-Elementor-Template-Kits-from-Themeforest-to-WordPress
Only logged in customers who have purchased this product may leave a review.


Reviews
There are no reviews yet.