


Web 2.0 – Directory plugin for WordPress
Original price was: ₹4,999.00.₹99.00Current price is: ₹99.00.
- Original product with the lowest price ever
- Downloaded from original authors
- Instant delivery with fast downloading speed
- 100% clean and tested code
- Product Version: v2.9.11 (Latest version)
- License: GPL
Web 2.0 – Directory plugin for WordPress
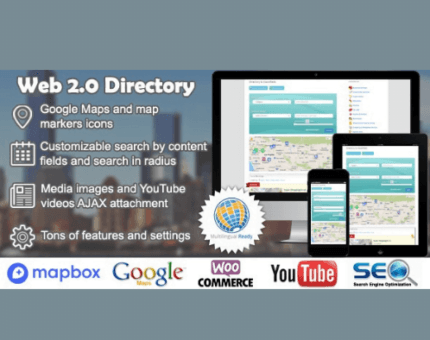
The easiest way to build an online WordPress directory website is to install the Web 2.0 Directory plugin. It is also straightforward to convert any existing site into a fully featured directory business website with the directory plugin—a wordpress directory plugin for any purpose. Examples would be classifieds, events directories, cars, bikes, boats, other vehicle dealers sites, restaurants, pets, real estate portals, wedding sites, yellow pages, local directories, and map store locators.
There are multiple options to set up revenue-generating streams and control them on your WordPress dashboard. You can use the plugin for both free and paid listings. The plugin allows visitors to submit new listings or even packages of listings, and claim and manage existing listings using the website frontend. Moreover, it also features a location-based directory. Maps & map markers functionality gives users fast and easy access to nearby places by the powerful search system.
The plugin offers tons of features. Print listing, save in bookmarks, download in PDF, SEO-friendly pages, images, YouTube and Vimeo videos attachments, custom fields, custom icons, customize colours, and much more customization options.
Web 2.0 – Directory plugin Features
- Restrict ads by listings levels
- Sell packages of listings
- PayPal payment gateway including PayPal subscriptions
- Stripe payments service
- Frontend dashboard for regular users
- Invoices management
- WooCommerce payments system compatible
- Sticky and featured listings options
- Raise directory listings – this option may be a payment
- Renew expired listings – this option may be a payment
- Upgrade/downgrade listings levels – this option may be a payment
- 5-star ratings for listings
- Customizable content fields of different types
- Font Awesome icons for custom content fields
- Category-based content fields
- Order directory listings by rating, distance, content fields
- Powerful search by content fields
- Adapted for the Relevanssi search plugin
- Icons for categories
- Search by categories and locations
- SEO friendly – fully compatible with Yoast WordPress SEO plugin
- Locations search in radius – results displayed on the map
- Multiple locations for one listing
- Google Maps and MapBox (OpenStreetMap) integrated
- The search form on a map
- Custom map markers
- Draw the search area on a map
- YouTube and Vimeo videos attachments for listings
- Images AJAX uploading
- Contact listing owner form + integration with Contact Form 7 plugin
- Bookmarks functionality
- Print listing option
- Get listing in PDF option
- Adapted for reCaptcha
- Fully customizable and easy to configuration
- The plugin uses custom post types and taxonomies
- Responsive design based on Twitter Bootstrap
- Fully compatible with Visual composer and SIteOrigin page builder
- directory shortcodes, including listings, maps, categories, locations, search box, slider
- directory widgets: search widget, categories widget, locations widget, listings widget, buttons, map, slider, sidebars widgets
- Custom Google Map and MapBox styles
- Supports RTL (Right To Left) – layout, functionality, UI widgets
- CSV import/export/bulk update with the ability to import images files
How to Install/Update WordPress Themes/Plugins manually?
Step 1: Buy the Product and download the zip file.
Note: Some Zip files need to be extracted before uploading.
If you are performing an update, install the latest theme/plugin, and WordPress will automatically replace the older version with a newer version. All your settings and customizations will be the same as before, and nothing will be changed.
Step 2: Go to “Appearance > Themes” If it’s a theme or go to the “Plugins” section if it’s a plugin through your WordPress dashboard.

Step 3: Click on “Add New” button (It’s same on themes and plugins section)

Step 4: Click on “Upload Theme” or you’ll show “Upload plugin” on plugin section

Step 5: Click on “Choose file” and select the ZIP file of that theme/plugin

Step 6: Hit “Install now”

Step 7: It’ll take few seconds to Install your wordpress product

Step 8: Once it’s done, click “Activate,” your WordPress product will be installed manually.
How to Install Elementor Template Kits?
Step 1: Download your kit file and do not unzip it.
Step 2: In WordPress, go to Settings > Permalinks and ensure Post Name is selected, then Save
Step 3: Go to Appearance > Themes > Add New and ensure Hello Elementor is installed and activated.
Step 4: The theme activation will prompt you to install and activate the Elementor Page Builder plugin if it is not already installed. Click Install, then Activate.
Step 5: Go to Elementor > Settings, click the Features tab, and ensure Flexbox Container has a green icon (if not, set it to Active).
Step 6: Go to Plugins > Add New and search for “Envato” and Install and Activate the Envato Elements – Photos & Elementor Templates plugin
Note: If your Kit requires Elementor Pro, you must install it before continuing.
Step 7: Go to Elements > Installed Kits and click Upload Template Kit ZIP File. Your templates should appear.
Step 8: Check for the orange banner at the top of the screen and click Install Requirements to load the kit addons and settings.
That’s it, and you’re ready to begin building your site!
- Imported templates are stored in Elementor under Templates > Saved Templates and must be inserted to a new page in WordPress before customizing.
- Imported blocks, tabs, or slides are stored in Elementor under Templates > Saved Templates and may be duplicated and customized directly.
- Elementor Pro site parts are stored in Elementor under Templates > Theme Builder and are customized directly.
Check the in-depth details with screenshots about how to install it here: (Copy the below link and open it in a new tab)
https://help.market.envato.com/hc/en-us/articles/36033428836889-How-to-Upload-Install-Elementor-Template-Kits-from-Themeforest-to-WordPress
Only logged in customers who have purchased this product may leave a review.


Reviews
There are no reviews yet.