


Ristorante 2.0 – Restaurant WordPress Theme
Original price was: ₹999.00.₹19.00Current price is: ₹19.00.
- Original product with the lowest price ever
- Downloaded from original authors
- Instant delivery with fast downloading speed
- 100% clean and tested code
- Product Version: Ristorante 2.0
- License: GPL
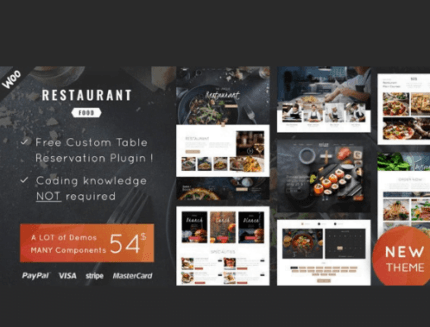
Ristorante – Restaurant WordPress Theme
The restaurant theme has been designed for all restaurants, includes the fantastic “Restaurant Reservations” plugin. You can set different restaurant timing and receive reservations with a deposit to guarantee the table reservation in your restaurant. The theme includes multiple payment systems and demos like Pizza, Asian cuisine restaurants, Italian restaurants, hamburgers, and other cool variations.
Restaurant WordPress theme for any business
Designed for any restaurant business, it is the perfect Restaurant WordPressPack for all kinds of restaurants, pizza, Asian cuisine, hamburger restaurants, and much more like :
- Restaurant
- Pizza
- Asian Cuisine
- Sushi Restaurant
- Sushi Bar
- Italian Food
- Hamburger
- Barbecue
- Restaurant Menu
- Pizza Delivery
- Cafeteria
- Winery and Wine Shop
- Japanese Food
- Mexican Menu
- Italian Cafe
- Fast Food
- Steakhouse
- Food Delivery
- Pizza Restaurant
- Food take away
Restaurant WordPress Theme Features
This Restaurant theme is 100% responsive, and it is tested on all major handheld devices. Also, it comes with the necessary features that each best website needs. In the Restaurant reservation theme, you have included the best and most famous plugins for setting up your site easily and in the best possible way; also, thanks to the custom Wp bakery page builder components included, you will have tons of components to build up your site just as you like. This Restaurant theme can manage all table reservations and offer a complete booking table design page. The table reservations page contains all the information the Restaurant needs to communicate to their guests, and there is a table reservation system. This Restaurant Booking theme includes many menu layouts, services pages, contact, food delivery system, and components. In this amazing Food theme, you will also have a custom plugin for table reservations to get the best result. Restaurant WordPress theme can be a great choice for your online presence, and here you can find a few features include:
- One-Click Demo Install
- Cross Browser Optimization
- Custom Google Maps design
- Detailed Documentation
- Woocommerce ready
- Fully Responsive
- Smooth transition effects
- Multiple Headers
- WPML compatible ( plugin not included )
- Fast and quality support
- Revolution Slider included
- Custom Footer with Page Builder
- Powerful Custom Admin Panel
- Theme settings backup import/export
- Seo Friendly
- Wp bakery page builder included (Page Builder)
- WordPress Live Customizer
- Contact Form 7
- Translation ready
- Events Calendar ready
- Google fonts
- Custom Table Reservation for Restaurant
- A lot of useful videos tutorials
- And much more Fun…
How to Install/Update WordPress Themes/Plugins manually?
Step 1: Buy the Product and download the zip file.
Note: Some Zip files need to be extracted before uploading.
If you are performing an update, install the latest theme/plugin, and WordPress will automatically replace the older version with a newer version. All your settings and customizations will be the same as before, and nothing will be changed.
Step 2: Go to “Appearance > Themes” If it’s a theme or go to the “Plugins” section if it’s a plugin through your WordPress dashboard.

Step 3: Click on “Add New” button (It’s same on themes and plugins section)

Step 4: Click on “Upload Theme” or you’ll show “Upload plugin” on plugin section

Step 5: Click on “Choose file” and select the ZIP file of that theme/plugin

Step 6: Hit “Install now”

Step 7: It’ll take few seconds to Install your wordpress product

Step 8: Once it’s done, click “Activate,” your WordPress product will be installed manually.
How to Install Elementor Template Kits?
Step 1: Download your kit file and do not unzip it.
Step 2: In WordPress, go to Settings > Permalinks and ensure Post Name is selected, then Save
Step 3: Go to Appearance > Themes > Add New and ensure Hello Elementor is installed and activated.
Step 4: The theme activation will prompt you to install and activate the Elementor Page Builder plugin if it is not already installed. Click Install, then Activate.
Step 5: Go to Elementor > Settings, click the Features tab, and ensure Flexbox Container has a green icon (if not, set it to Active).
Step 6: Go to Plugins > Add New and search for “Envato” and Install and Activate the Envato Elements – Photos & Elementor Templates plugin
Note: If your Kit requires Elementor Pro, you must install it before continuing.
Step 7: Go to Elements > Installed Kits and click Upload Template Kit ZIP File. Your templates should appear.
Step 8: Check for the orange banner at the top of the screen and click Install Requirements to load the kit addons and settings.
That’s it, and you’re ready to begin building your site!
- Imported templates are stored in Elementor under Templates > Saved Templates and must be inserted to a new page in WordPress before customizing.
- Imported blocks, tabs, or slides are stored in Elementor under Templates > Saved Templates and may be duplicated and customized directly.
- Elementor Pro site parts are stored in Elementor under Templates > Theme Builder and are customized directly.
Check the in-depth details with screenshots about how to install it here: (Copy the below link and open it in a new tab)
https://help.market.envato.com/hc/en-us/articles/36033428836889-How-to-Upload-Install-Elementor-Template-Kits-from-Themeforest-to-WordPress
How to Install/Update WordPress Themes/Plugins manually?
Step 1: Buy the Product and download the zip file.
Note: Some Zip files need to be extracted before uploading.
If you are performing an update, install the latest theme/plugin, and WordPress will automatically replace the older version with a newer version. All your settings and customizations will be the same as before, and nothing will be changed.
Step 2: Go to “Appearance > Themes” If it’s a theme or go to the “Plugins” section if it’s a plugin through your WordPress dashboard.
Step 3: Click on “Add New” button (It’s same on themes and plugins section)
Step 4: Click on “Upload Theme” or you’ll show “Upload plugin” on plugin section
Step 5: Click on “Choose file” and select the ZIP file of that theme/plugin
Step 6: Hit “Install now”
Step 7: It’ll take few seconds to Install your wordpress product
Step 8: Once it’s done, click “Activate,” your WordPress product will be installed manually.
How to Install Elementor Template Kits?
Step 1: Download your kit file and do not unzip it.
Step 2: In WordPress, go to Settings > Permalinks and ensure Post Name is selected, then Save
Step 3: Go to Appearance > Themes > Add New and ensure Hello Elementor is installed and activated.
Step 4: The theme activation will prompt you to install and activate the Elementor Page Builder plugin if it is not already installed. Click Install, then Activate.
Step 5: Go to Elementor > Settings, click the Features tab, and ensure Flexbox Container has a green icon (if not, set it to Active).
Step 6: Go to Plugins > Add New and search for “Envato” and Install and Activate the Envato Elements – Photos & Elementor Templates plugin
Note: If your Kit requires Elementor Pro, you must install it before continuing.
Step 7: Go to Elements > Installed Kits and click Upload Template Kit ZIP File. Your templates should appear.
Step 8: Check for the orange banner at the top of the screen and click Install Requirements to load the kit addons and settings.
That’s it, and you’re ready to begin building your site!
- Imported templates are stored in Elementor under Templates > Saved Templates and must be inserted to a new page in WordPress before customizing.
- Imported blocks, tabs, or slides are stored in Elementor under Templates > Saved Templates and may be duplicated and customized directly.
- Elementor Pro site parts are stored in Elementor under Templates > Theme Builder and are customized directly.
Check the in-depth details with screenshots about how to install it here: (Copy the below link and open it in a new tab)
https://help.market.envato.com/hc/en-us/articles/36033428836889-How-to-Upload-Install-Elementor-Template-Kits-from-Themeforest-to-WordPress
Only logged in customers who have purchased this product may leave a review.


Reviews
There are no reviews yet.