


RoyalSlider v3.4.1 – Touch Content Slider for WordPress
Original price was: ₹999.00.₹19.00Current price is: ₹19.00.
- Original product with the lowest price ever
- Downloaded from original authors
- Instant delivery with fast downloading speed
- 100% clean and tested code
- Product Version: RoyalSlider v3.4.1 (Latest version)
- License: GPL
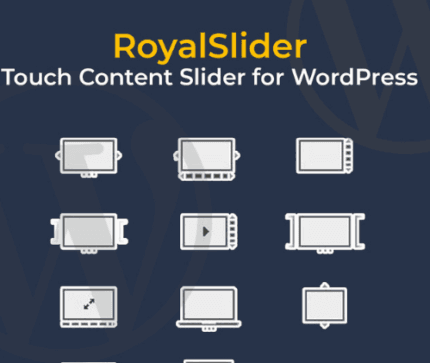
RoyalSlider – Touch Content Slider for WordPress
Royal Slider for WordPress is a responsive image gallery and HTML content slider plugin with touch swipe navigation. The plugin is mobile-friendly and allows the creation of completely custom slideshows and css3 banner rotators with images, videos, or HTML content in slides.
You can also dynamically populate data from Flickr or featured posts of any post type – like WooCommerce products. Developed in best practices of CSS3 and HTML5. For a photo gallery, you can enable vertical or horizontal thumbnails, enable lazy-loading, or fullscreen. Carousel also supports YouTube or Vimeo videos that allow you to create video galleries.
Royal Slider is focused on performance, accessibility, stability, and providing the best experience for users with any device. It doesn’t have a dozen fancy transition effects, but it has worked as fast and as smooth as current-day technology allows. Script modular architecture allows you to exclude the parts that you don’t need from the main JS file to optimize it even more.
RoyalSlider – Touch Content Slider for WordPress Features
- Touch swipe navigation support for iOS (all versions), Android 2.3+, IE10, IE11, Blackberry, and other OS and browsers support touch or pointer events.
- Hardware-accelerated CSS3 transitions for devices.
- Any HTML in slides and thumbnails, everything is responsive and can be resized dynamically.
- YouTube and Vimeo videos in slide
- Smart lazy-loading — preloads nearby images.
- Memory management – automatically removes unused slides from DOM.
- Move or fade transition for slides.
- SEO optimized, search engines index even lazy-loaded images.
- Vertical or horizontal thumbnails, bullets, or navigation tabs.
- Responsive layout down to mobile.
- HTML blocks with custom effects (fade, move top, move right… or none).
- Image and/or HTML content for each slide.
- Multiple sliders per page are allowed, even with different skins.
- 4 unique skins that can easily be editable using CSS. Photoshop files included.
- Slider files are included only in posts where the slider is used.
- Smart autoplay that pauses on hover and stops at first user action.
- Physics-based touch thumbnails image scroller that can be placed anywhere on a page.
- Thumbnails can be scrollable in one line and should have the same size. Tabs can have different sizes but can’t be scrollable.
- Optional keyboard navigation and much more…
- It doesn’t block vertical scrolling, doesn’t block default browser zoom, works if javascript is disabled, allows navigating as fast as the user wants (doesn’t block navigation during transition), has options to disable mouse/touch drag for slides and thumbnails.
- IE10 touch support.
How to Install/Update WordPress Themes/Plugins manually?
Step 1: Buy the Product and download the zip file.
Note: Some Zip files need to be extracted before uploading.
If you are performing an update, install the latest theme/plugin, and WordPress will automatically replace the older version with a newer version. All your settings and customizations will be the same as before, and nothing will be changed.
Step 2: Go to “Appearance > Themes” If it’s a theme or go to the “Plugins” section if it’s a plugin through your WordPress dashboard.

Step 3: Click on “Add New” button (It’s same on themes and plugins section)

Step 4: Click on “Upload Theme” or you’ll show “Upload plugin” on plugin section

Step 5: Click on “Choose file” and select the ZIP file of that theme/plugin

Step 6: Hit “Install now”

Step 7: It’ll take few seconds to Install your wordpress product

Step 8: Once it’s done, click “Activate,” your WordPress product will be installed manually.
How to Install Elementor Template Kits?
Step 1: Download your kit file and do not unzip it.
Step 2: In WordPress, go to Settings > Permalinks and ensure Post Name is selected, then Save
Step 3: Go to Appearance > Themes > Add New and ensure Hello Elementor is installed and activated.
Step 4: The theme activation will prompt you to install and activate the Elementor Page Builder plugin if it is not already installed. Click Install, then Activate.
Step 5: Go to Elementor > Settings, click the Features tab, and ensure Flexbox Container has a green icon (if not, set it to Active).
Step 6: Go to Plugins > Add New and search for “Envato” and Install and Activate the Envato Elements – Photos & Elementor Templates plugin
Note: If your Kit requires Elementor Pro, you must install it before continuing.
Step 7: Go to Elements > Installed Kits and click Upload Template Kit ZIP File. Your templates should appear.
Step 8: Check for the orange banner at the top of the screen and click Install Requirements to load the kit addons and settings.
That’s it, and you’re ready to begin building your site!
- Imported templates are stored in Elementor under Templates > Saved Templates and must be inserted to a new page in WordPress before customizing.
- Imported blocks, tabs, or slides are stored in Elementor under Templates > Saved Templates and may be duplicated and customized directly.
- Elementor Pro site parts are stored in Elementor under Templates > Theme Builder and are customized directly.
Check the in-depth details with screenshots about how to install it here: (Copy the below link and open it in a new tab)
https://help.market.envato.com/hc/en-us/articles/36033428836889-How-to-Upload-Install-Elementor-Template-Kits-from-Themeforest-to-WordPress
How to Install/Update WordPress Themes/Plugins manually?
Step 1: Buy the Product and download the zip file.
Note: Some Zip files need to be extracted before uploading.
If you are performing an update, install the latest theme/plugin, and WordPress will automatically replace the older version with a newer version. All your settings and customizations will be the same as before, and nothing will be changed.
Step 2: Go to “Appearance > Themes” If it’s a theme or go to the “Plugins” section if it’s a plugin through your WordPress dashboard.
Step 3: Click on “Add New” button (It’s same on themes and plugins section)
Step 4: Click on “Upload Theme” or you’ll show “Upload plugin” on plugin section
Step 5: Click on “Choose file” and select the ZIP file of that theme/plugin
Step 6: Hit “Install now”
Step 7: It’ll take few seconds to Install your wordpress product
Step 8: Once it’s done, click “Activate,” your WordPress product will be installed manually.
How to Install Elementor Template Kits?
Step 1: Download your kit file and do not unzip it.
Step 2: In WordPress, go to Settings > Permalinks and ensure Post Name is selected, then Save
Step 3: Go to Appearance > Themes > Add New and ensure Hello Elementor is installed and activated.
Step 4: The theme activation will prompt you to install and activate the Elementor Page Builder plugin if it is not already installed. Click Install, then Activate.
Step 5: Go to Elementor > Settings, click the Features tab, and ensure Flexbox Container has a green icon (if not, set it to Active).
Step 6: Go to Plugins > Add New and search for “Envato” and Install and Activate the Envato Elements – Photos & Elementor Templates plugin
Note: If your Kit requires Elementor Pro, you must install it before continuing.
Step 7: Go to Elements > Installed Kits and click Upload Template Kit ZIP File. Your templates should appear.
Step 8: Check for the orange banner at the top of the screen and click Install Requirements to load the kit addons and settings.
That’s it, and you’re ready to begin building your site!
- Imported templates are stored in Elementor under Templates > Saved Templates and must be inserted to a new page in WordPress before customizing.
- Imported blocks, tabs, or slides are stored in Elementor under Templates > Saved Templates and may be duplicated and customized directly.
- Elementor Pro site parts are stored in Elementor under Templates > Theme Builder and are customized directly.
Check the in-depth details with screenshots about how to install it here: (Copy the below link and open it in a new tab)
https://help.market.envato.com/hc/en-us/articles/36033428836889-How-to-Upload-Install-Elementor-Template-Kits-from-Themeforest-to-WordPress
Only logged in customers who have purchased this product may leave a review.


Reviews
There are no reviews yet.