


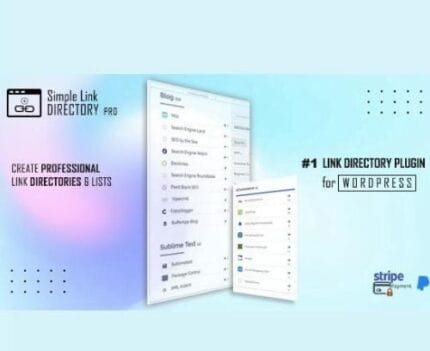
Simple Link Directory Pro 13.3.4 – WordPress Plugin
Original price was: ₹999.00.₹19.00Current price is: ₹19.00.
- Original product with the lowest price ever
- Downloaded from original authors
- Instant delivery with fast downloading speed
- 100% clean and tested code
- Product Version: Simple Link Directory Pro 13.3.4
- License: GPL
Simple Link Directory Pro – WordPress Plugin
Simple Link Directory Pro is a unique, advanced, and simple WordPress Directory plugin for Listing Directory and Content Curation. Create innovative and elegant Link Directory, Link Lists, Link Collection, Link Page, Resource Page, Listing Directory, Topsite script, Logo Showcase, Video Gallery, Youtube Video Directory, Video Database, or Partners page on your WordPress website in a matter of minutes. Monetize Directory with Paid Listing and Claim Listing features.
Simple Link Directory Pro Features
Usability
- Build unlimited Lists and show them on one page or multiple pages
- Auto Generate Title and Description from website link
- Auto Generate Thumbnail from Website link
- Topic-based Link Lists that can be Displayed Category wise
- Multi-Page mode generates Category, Lists, and Link Details pages automatically starting with your page slug from a single shortcode
- Tabbed Category Listing of All Your Directory Lists
- Video Gallery – Vimeo Video Directory and Youtube Video Directory
- Play Youtube Video and Vimeo Video Links in a LightBox Modal
- Use as Link Directory, Resources page, Links page, Partners page, Associates page, Logo showcase, Local Business Directory, or Vendors page. Possibilities are endless
- Live, on-the page, instant search
- Live, on-the page, instant filtering of lists
- Live, on-the page, instant filtering by Tags
- Scroll to Top Button
- RTL support
- Optional Fixed Position Filter buttons that can be Left aligned or placed at the top of your Lists
- Multi-Language support with mo/pot file. Dutch and Russian language files included.
- Compatible with Gutenberg, Visual Composer, Elementor, Beaver Builder, or any Visual Builder supporting shortcode.
Community Features
- Allow users to submit links to your directory
- Complete front end user registration, login, and link submission
- Free or Paid Link Listing Opportunity
- Auto approve option for user registration to the directory
- New user role: SLD User
- Allow any WordPress User to Add Link (use other plugins for registration/payment)
- Auto approve links option
- Manage user-submitted links to the directory
- Unlimited front end link submission for Admin user
- Invite user interaction with Upvote
- Enable Upvote for Main Click in General settings
- Choose your UpVote icon: Thumbs up, Firey Hot, Heart, Star, or Smiley Face.
- Allow users to embed your lists on their websites
- Allow registered users to create their own Favorite List of links
Design
- 16 templates to choose from for Single Page mode
- 2 templates to choose from for Multi-Page mode
- Create custom templates or customize templates from your theme folder
- Fully responsive and modern designs
- Directory templates are designed for different use case scenarios
- Use theme fonts or choose a Google font
- Fixed position filtering area
- Custom CSS to add your own style
Front End Submission Features
- Front End User Registration with Captcha, Login, Link Submission, DashBoard
- An alternative option for link submission button (link to a contact form or google doc)
- Admin Approves User Submitted Links to Listing Directory or Set to Auto Approve
- Enable Free Frontend Submission
- Free Submission Limit
- Enable Email Notification for New Item Submission
- Mark Paid Item as Featured
- Show Featured Item at Top
- Registration Captcha
- Allow any logged-in user to add links. It makes it possible for your existing site users to add links without registering again or use 3rd party plugins for user registration and payment.
- Allow User to Update Profile
- Allow User to Upload Image
- Do Not Allow do-follow Links
- Auto Approve Registered Users
- Auto Approve Item Submission
- Exclude Lists from Front End Submission
- Enable Email Notification for Package Expiration
- Enable Claim Listing
- Show Claim Listing Button at Top
- Enable Paypal payment
- Enable Paypal Test Mode
- Enable Stripe payment
- Supports recurring payment
Admin Friendly Functionality
- 5 ways to add images: Auto Favicon, Font Awesome Icon, Upload Image, Paste Image Link OR Auto Generate Screenshot thumbnails from Website Links
- Auto Generate Title and Description from website link
- Auto Generate Thumbnail from Website link
- 3 Sidebar Widgets for Latest Links, Most Populat Links, and Random Links
- User UpVote Management
- Reset Upvotes – Upvote Expire after certain days
- Admin settings to turn on/off the live search, filtering
- Two Different Ways to Edit Directory Lists
- Copy List Items or Links to Other Lists
- Unpublish List Items or Links
- Admin settings to turn on/off the live search, filtering
- Text block with each list that supports any shortcode. Display Ads Inside Directory
- Embed option. Other website owners can now embed the useful lists you create on their websites with a backlink to your own website. Configure the text that will show with the embeds. Great for SEO!
- Click Statistics
- CSV Import to create new lists easily.
- CSV Export your lists for backup
- Import your exported CSV back with update lists
- Edit Front End Text Labels from Language Settings Area
Customizability and Flexibility
- Choose theme font or google font.
- Configurable highlight color for each list
- Customize colors, fonts, and almost all aspects of the link lists
- Customize templates from your theme folder
- Complete control over directory list ordering
- Custom Ordering of Lists
- Order List Items by Upvotes, Item title, Date
- Randomize Lists and List Items
- Over a dozen shortcode parameters
- Easy and Powerful Shortcode Generator – no need to hunt down all the different parameters
- Custom JS and CSS panel to modify directory functionality
- Pagination for List Items is available as a shortcode option.
- Mark Directory Links as New or Featured
- Expire Items Marked as New After a Certain Time Defined by You
- Language center to easily update all front end languages
Topsite List Script Features
- Order Listing Directory by Link Clicks
- Click statistics for admin
- Restrict upvote by IP
- Restrict UpVote for Logged in Users only
- Reset upvotes for Specific Lists
- Reset upvotes for All Lists
- Enable Upvote for Main Click in General settings
Link Directory for Company Intranet :
- Media or Marketing companies often require their company employees to access certain websites on a regular basis. You can create link directories for your company Intranet using Simple Link Directory and allow your employees to create their own bookmark or favorite list of links selected from your directory listings.
- Any logged-in user can create their own favorite List of Links by bookmarking links from your directory lists.
- Dynamically add or remove links from favorite bookmark list from front end
- Use a single master CSV file to Export and Import your directory listings
How to Install/Update WordPress Themes/Plugins manually?
Step 1: Buy the Product and download the zip file.
Note: Some Zip files need to be extracted before uploading.
If you are performing an update, install the latest theme/plugin, and WordPress will automatically replace the older version with a newer version. All your settings and customizations will be the same as before, and nothing will be changed.
Step 2: Go to “Appearance > Themes” If it’s a theme or go to the “Plugins” section if it’s a plugin through your WordPress dashboard.

Step 3: Click on “Add New” button (It’s same on themes and plugins section)

Step 4: Click on “Upload Theme” or you’ll show “Upload plugin” on plugin section

Step 5: Click on “Choose file” and select the ZIP file of that theme/plugin

Step 6: Hit “Install now”

Step 7: It’ll take few seconds to Install your wordpress product

Step 8: Once it’s done, click “Activate,” your WordPress product will be installed manually.
How to Install Elementor Template Kits?
Step 1: Download your kit file and do not unzip it.
Step 2: In WordPress, go to Settings > Permalinks and ensure Post Name is selected, then Save
Step 3: Go to Appearance > Themes > Add New and ensure Hello Elementor is installed and activated.
Step 4: The theme activation will prompt you to install and activate the Elementor Page Builder plugin if it is not already installed. Click Install, then Activate.
Step 5: Go to Elementor > Settings, click the Features tab, and ensure Flexbox Container has a green icon (if not, set it to Active).
Step 6: Go to Plugins > Add New and search for “Envato” and Install and Activate the Envato Elements – Photos & Elementor Templates plugin
Note: If your Kit requires Elementor Pro, you must install it before continuing.
Step 7: Go to Elements > Installed Kits and click Upload Template Kit ZIP File. Your templates should appear.
Step 8: Check for the orange banner at the top of the screen and click Install Requirements to load the kit addons and settings.
That’s it, and you’re ready to begin building your site!
- Imported templates are stored in Elementor under Templates > Saved Templates and must be inserted to a new page in WordPress before customizing.
- Imported blocks, tabs, or slides are stored in Elementor under Templates > Saved Templates and may be duplicated and customized directly.
- Elementor Pro site parts are stored in Elementor under Templates > Theme Builder and are customized directly.
Check the in-depth details with screenshots about how to install it here: (Copy the below link and open it in a new tab)
https://help.market.envato.com/hc/en-us/articles/36033428836889-How-to-Upload-Install-Elementor-Template-Kits-from-Themeforest-to-WordPress
How to Install/Update WordPress Themes/Plugins manually?
Step 1: Buy the Product and download the zip file.
Note: Some Zip files need to be extracted before uploading.
If you are performing an update, install the latest theme/plugin, and WordPress will automatically replace the older version with a newer version. All your settings and customizations will be the same as before, and nothing will be changed.
Step 2: Go to “Appearance > Themes” If it’s a theme or go to the “Plugins” section if it’s a plugin through your WordPress dashboard.
Step 3: Click on “Add New” button (It’s same on themes and plugins section)
Step 4: Click on “Upload Theme” or you’ll show “Upload plugin” on plugin section
Step 5: Click on “Choose file” and select the ZIP file of that theme/plugin
Step 6: Hit “Install now”
Step 7: It’ll take few seconds to Install your wordpress product
Step 8: Once it’s done, click “Activate,” your WordPress product will be installed manually.
How to Install Elementor Template Kits?
Step 1: Download your kit file and do not unzip it.
Step 2: In WordPress, go to Settings > Permalinks and ensure Post Name is selected, then Save
Step 3: Go to Appearance > Themes > Add New and ensure Hello Elementor is installed and activated.
Step 4: The theme activation will prompt you to install and activate the Elementor Page Builder plugin if it is not already installed. Click Install, then Activate.
Step 5: Go to Elementor > Settings, click the Features tab, and ensure Flexbox Container has a green icon (if not, set it to Active).
Step 6: Go to Plugins > Add New and search for “Envato” and Install and Activate the Envato Elements – Photos & Elementor Templates plugin
Note: If your Kit requires Elementor Pro, you must install it before continuing.
Step 7: Go to Elements > Installed Kits and click Upload Template Kit ZIP File. Your templates should appear.
Step 8: Check for the orange banner at the top of the screen and click Install Requirements to load the kit addons and settings.
That’s it, and you’re ready to begin building your site!
- Imported templates are stored in Elementor under Templates > Saved Templates and must be inserted to a new page in WordPress before customizing.
- Imported blocks, tabs, or slides are stored in Elementor under Templates > Saved Templates and may be duplicated and customized directly.
- Elementor Pro site parts are stored in Elementor under Templates > Theme Builder and are customized directly.
Check the in-depth details with screenshots about how to install it here: (Copy the below link and open it in a new tab)
https://help.market.envato.com/hc/en-us/articles/36033428836889-How-to-Upload-Install-Elementor-Template-Kits-from-Themeforest-to-WordPress
Only logged in customers who have purchased this product may leave a review.


Reviews
There are no reviews yet.